(backup from Coticule.be)
Razor Rescaling Project
Rescaling a razor is really not as difficult as it may seem. Here we will try to get through a current project to demonstrate one method.
I would like to emphasize the “one method” part. Nothing here is written in stone, and I encourage you to experiment and look for better or easier ways to accomplish what I have done here. With that in mind, let’s get started.
I would like to encourage you to use extreme caution when working around moving machinery. Observe all the normal safety rules and wear eye protection. A mask, of some type should also be worn when sanding or applying your finish, and make sure you have proper ventilation.
In some cases, there are products listed here that may not be available to you. I am not familiar with all the possible replacements, but maybe someone on the Coticule.be forum is. Please post there if you need advice.
Part 1
We will start this project with a razor that has a set of scales that need to be replaced the replacement scales have already been made. Making scales and finishing will be in another project.

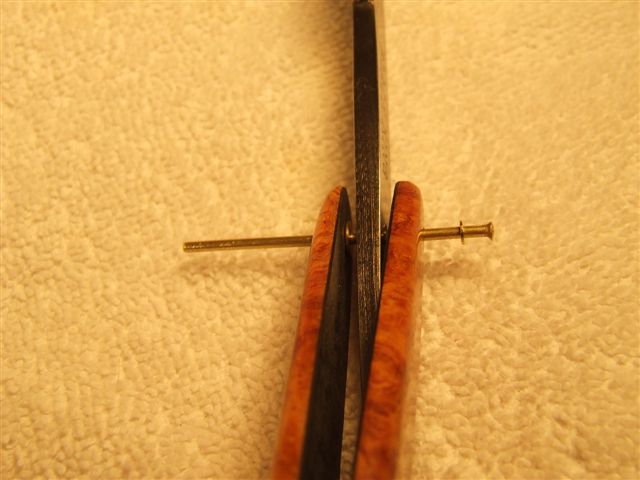
The first thing we need to do is fit the blade to the scales. But before we do this, we must make sure the pivot hole is exactly the right size for the pin. As you can see in the next photo, the pivot hole is worn, allowing the pin to wobble out of center. It is not critical that the hole be centered in the hole, but it is critical that it be perfectly sized for the pin that goes through it.

To solve this problem we will install a brass bushing inside the hole that the 1/16″ pin can pivot on eliminating any misalignment or pin collapse when we peen the ends down.
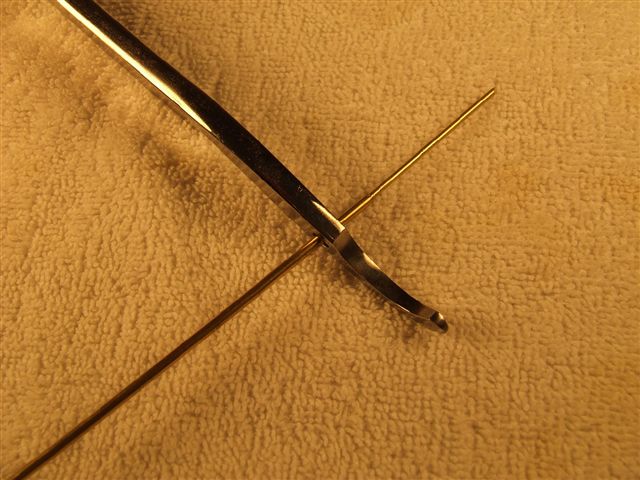
It is a little hard to see, but there is a brass tube going through the hole with the pin extending out the upper right of it.
There are several ways to get the bushing mounted in the hole. One is to fill the hole with epoxy and drill it the same size as the outside diameter of the tube, install the tube and cut it flush with the blade and file as needed for a smooth fit.
The other is to drill the hole larger to fit the brass tube, insert the brass tube and again, cut it off and file as needed.
And sometimes, the tube will just fit the hole. Don’t count on this happening too often though.
Once you get the tube installed it will look like this.
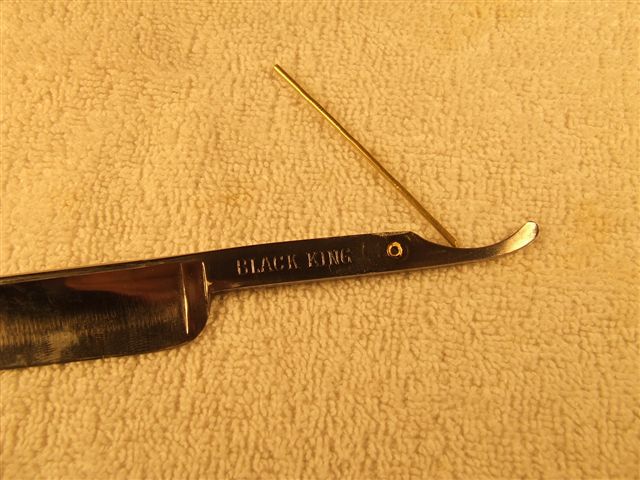
And it will look like this.

Do not, under any circumstances, allow this pivot pin to be allowed to move laterally. It will just bend when you try to tighten it. When we do mount the blade, we will use washers as pivot points against the scales to eliminate wear.
After we have the blade ready to fit and mount, we need to decide what material we want to use for the wedge. I have never seen a vintage razor that didn’t have a true wedge. Not until people started using scale material that was too hard to bend or just couldn’t figure out why a wedge was needed, did you start to see flat spacers replace wedges. Some even try using resting pins to make up for their mistakes.
If you look at your razors, you will see that the gap in the scales needs to be close at the wedge end, wider in the middle and start to close up again at the pivot point. All of this allows for the configuration of the blade itself. This is usually narrow at the toe, wider at the heel where the tang enters the scales and narrower at the pivot point.
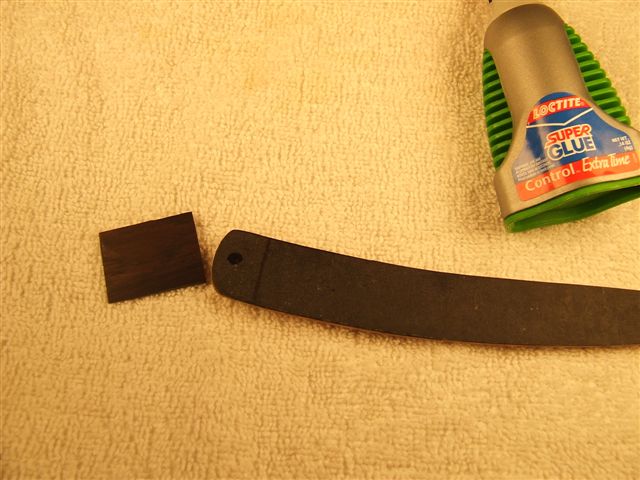
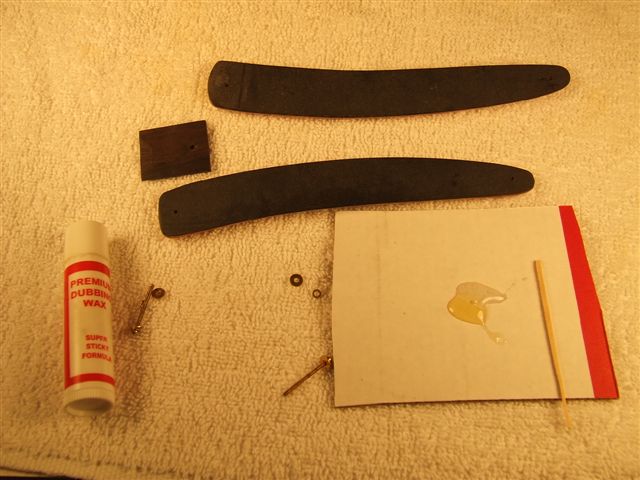
So what are we going to use for the wedge? Here are some choices I have picked.
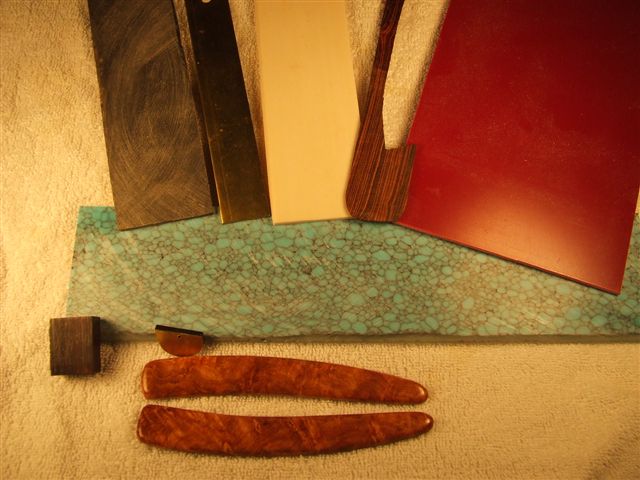
From right above the scales going clockwise, here is what we are looking at:
Ebony with brass liner
Ebony plain
Horn
Brass
Faux Ivory
Cocobolo
Red Micarta
and the horizontal slab is reconstituted Turquoise with black lines
I thought maybe the Turquoise would work, but it didn’t. The simplicity of this razor and the natural color of the Amboyna made me decide just plain black Ebony was the best choice.
In the next step, I will show you how to determine where to set the blade and the wedge. How to mount the wedge and how to make sure everything is lined up correctly while the glue is setting.
Part 2
In step 1 of this project, we managed to get the scales ready for gluing and pinning. We also looked at several options for our wedge and made some choices.
In step 2, we are going to drill the wedge and scales for both the pivot end and wedge end. Then we are going to glue the wedge in place, making sure the pivot end is aligned correctly. We have a lot of stuff to cover so let’s get to it.
The first thing I want to cover is the wedge. I measured the thickness of the blade just ahead of the pivot hole. It was 4mm wide. Remember our rule of thumb, make the wedge 1/2 the thickness we just measured. I made the wedge 2mm and here is what that looks like.


Now we have all the pieces required to get the scales set and mount the blade. The first thing we need to do then is decide where the pivot point of the blade is going to be located, mark it and drill both scales, at the same time, so we have an exact alignment. To do this, we will take one scale and place the blade on top of it and find a position for the pivot pin that lies on the flat of the scale. Be careful here and don’t make the mistake of allowing the washer to lay over the curve. Here, we are looking for that perfect location.

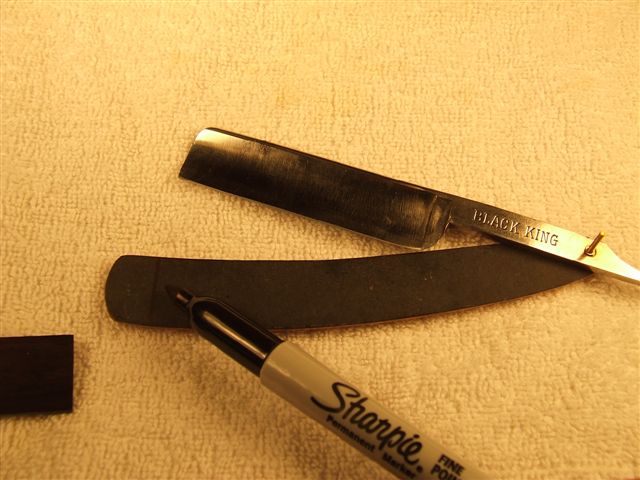
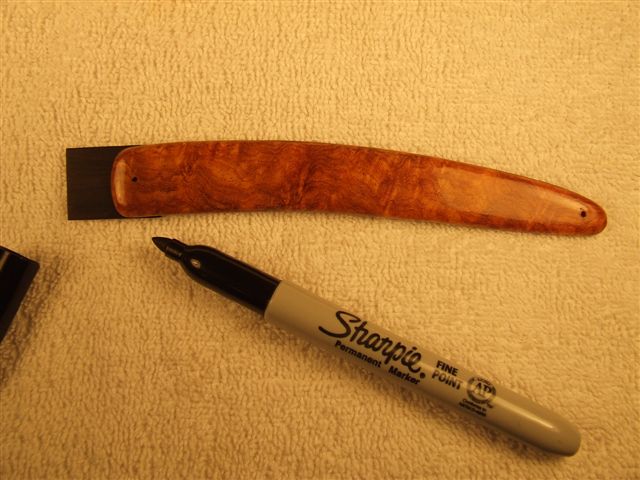
After finding the location, we mark it with a magic marker, as you can see in this photo.

Now we need to put the pair of scales together, lign them up and clamp them together. We will then put them in the drill press, make sure the bottom side is flat and perpendicular to the 1/16″ drill bit and drill the hole. After the hole is drilled, we will put a #80 screw through the pin hole.

It is time to figure out where the wedge is going to go. We will mount the blade on the pin and mark the location for the wedge. Usually we want between 1/16″ and 1/8″ clearance from the tip of the blade. With the blade in position, place the wedge on the scale, and mark the finished location with a marker.


Now, we need to temporarily glue the wedge in place on the marked scale. I use only 1 small drop of CA glue to do this. You could also use something like rubber cement, or a drop of contact cement if you don’t have any CA around.
Now that we have the wedge temporarily in place, we need to mark where we want to install the pin. Here we will simply decide, by looks, and mark its position.
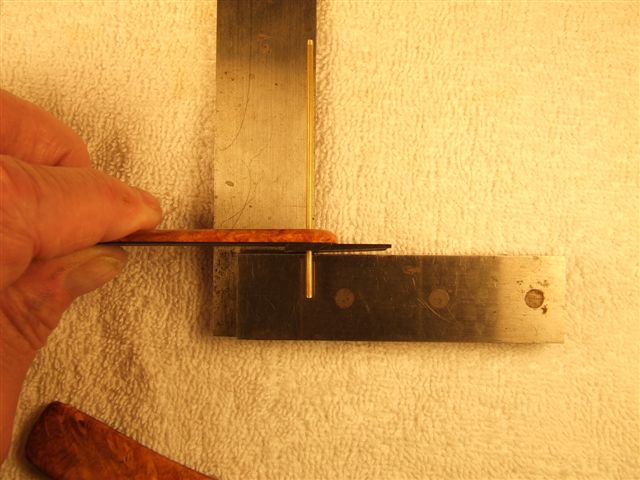
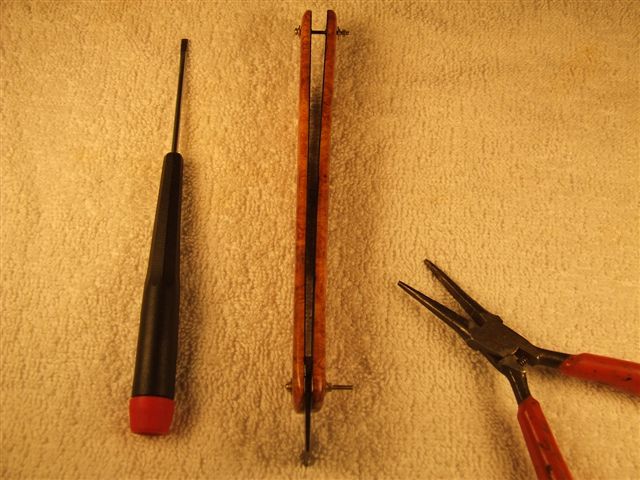
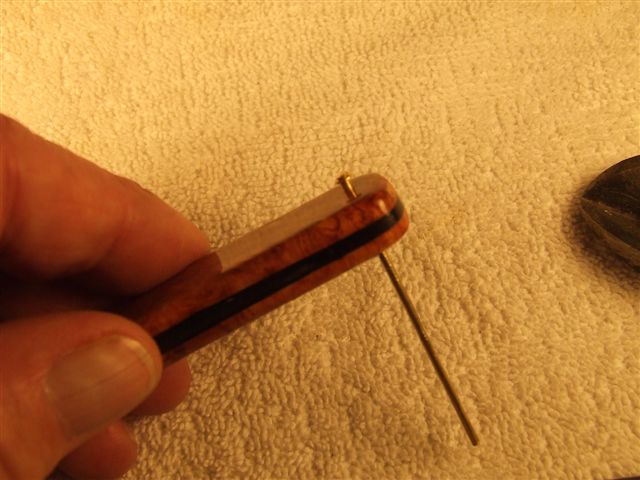
Next, we will take this out to the drill press and drill our 1/16″ hole. When we drill this hole, we want to make sure we have the center line of the wedge perpendicular to the drill bit. After drilling the hole, I took this photo to try and illustrate that alignment by using a pin in the hole and setting the center line horizontal to the square. As you can see, once that is done, the pin is perpendicular to that center line.
Now comes the fun part. We need to drill the remainder of the wedge hole, but it is critical that this end up in perfect alignment with the pivot pin. Getting this hole out of alignment is usually the cause for blades not centering on the scales.
To do this we will put the scales together at the pivot end using an adjustable pin and washers. Once the pin is in, we will clamp the two wedge ends together and begin to align them with the pivot hole.

By squeezing the pivot end together and trying to move the pin back and forth, we can tell if there is a misalignment. If there is, try and reposition the clamp and recheck. Make sure you do not cover the bottom scale where the drill bit is goin to exit when you drill it. Once you can move the pin freely, drill the rest of the hole using the same procedure as described above.

Once we get the drilling completed on the wedge end, we are ready to start putting the scales together. But first, we need to remove the wedge from the scale it was temporarily glued to. Removing the wedge is easy, you just pop it off with a razor knife. Before you do that, though, put a mark on one side so you don’t install it backwards on the scales.

Now the scales are ready to glue to the wedge. Here are some of the miscellaneous items I will be using.
The wedge is made from a very oily wood, Ebony, and needs to have that oil removed. Either one of these products will do that just fine. I chose Acetone just because I put the other away first. Naphtha is another product that works very well also.

The adjustable pin that goes through the wedge end, needs to be coated with something to keep it from being glued into the end, and I have had this happen more than once. Since I am a fly tyer, I had some dubbing wax available and use that. Vaseline, chap stick, or anything like that will also work.

Of course there are the various screws, nuts and washers.

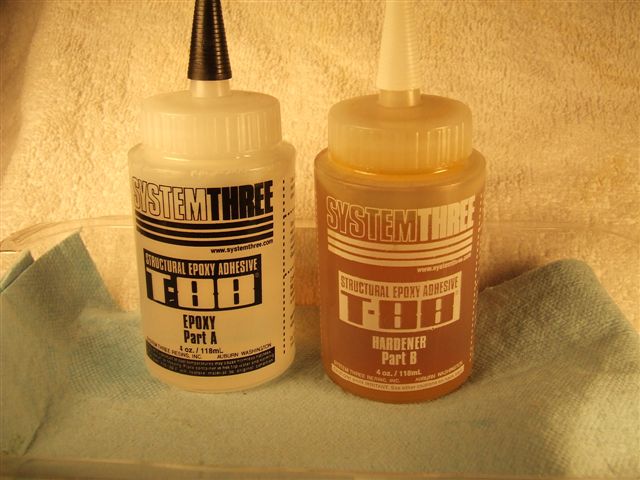
The final product is my choice of epoxy. I use System 3 T-88. It is a slow setting epoxy with incredible bonding qualities. I think you could use any other epoxy that takes 8hrs to set, but I haven’t tried them.
So now we are ready to do the gluing. Prep the surface of the wedge and scales with the oil remover, coat the pin with wax, and mix a couple of dollops of epoxy with a toothpick. You are now ready to go.
Spread a light amount of the epoxy on the scale where the wedge goes. Don’t over do this, it will make a real mess.

Put the pin through the wedge and align the edge of the wedge with the mark we made earlier. Then put a little glue on the top of the wedge.
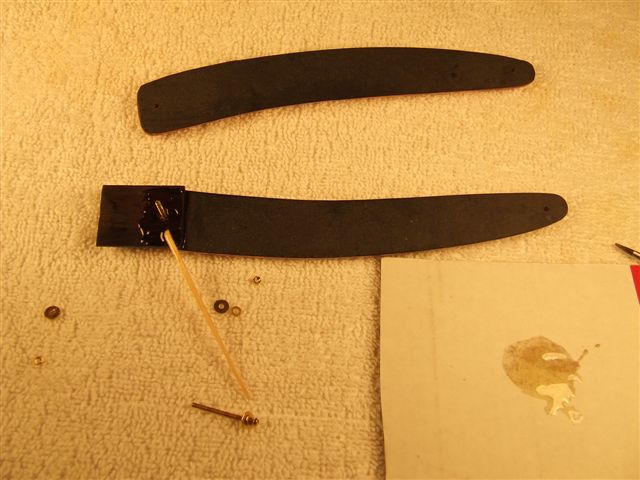
Put the remaining scale on and the washers and nut. Holding the nut with your fingers, tighten the screw as tight as you can.

Add the pivot pin, align the scales as before and tighten the wedge end down tight. Recheck the alignment, and if it is good, let the scales set for the night.
Part 3
In this 3rd and final, we will finish the handle,mount the blade and set the pins.
Here is what the wedge end of the scales looked like after the glue set over night.
The first step is to cut off the excess wedge material so we can sand and finish the end.
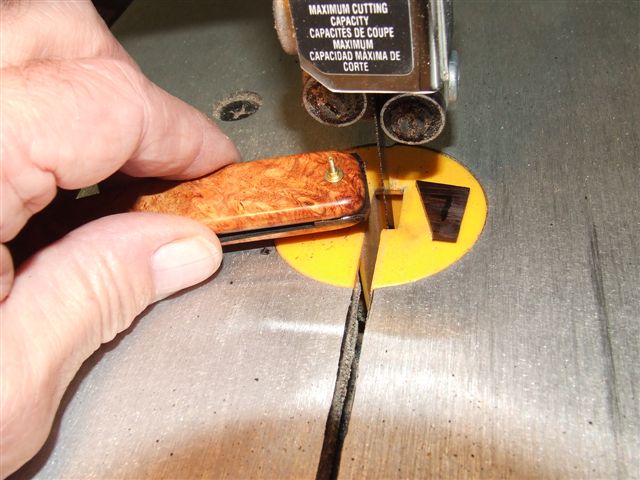

First we will machine sand the wedge as close as possible to the scales, without damaging the scales.


This is what it looked like before the hand sanding for final finish.

We then take 600 and 1500 grit sandpaper to polish the end for final finish.

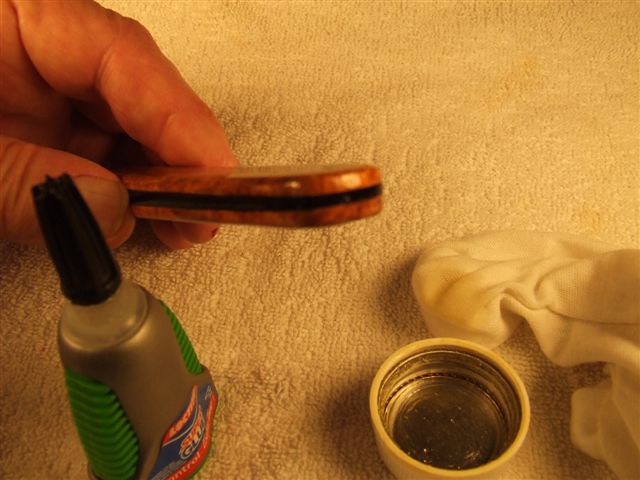
will be doing a writeup on how to apply a CA finish in the future, but for now, here is a list of the items we will use here. Since this had 12 coats of CA, we will apply an additional 8 coats to match up the end with the rest of the scales.
The primary items are the CA, of course, and Boiled linseed oil. The linseed oil is used as an accelerator to set the CA faster. Also, not shown in the photo is a piece of T-shirt used for spreading the CA and the linseed oil.

After the CA is set, we need to sand it with the 1500 grit sandpaper and the final polishing is done with a good furniture polish.

Put a drop of CA on the surface of the end and spread it using the t-shirt, only in one direction, on the end and sides. After 4 coats, put just a drop or two of the linseed oil on a new spot on the rag, and spread it on the CA. As soon as you start to wipe it on, the CA will setup. Wait a minute or so, wipe it off, with a clean rag, and you can apply the balance of the CA coats.
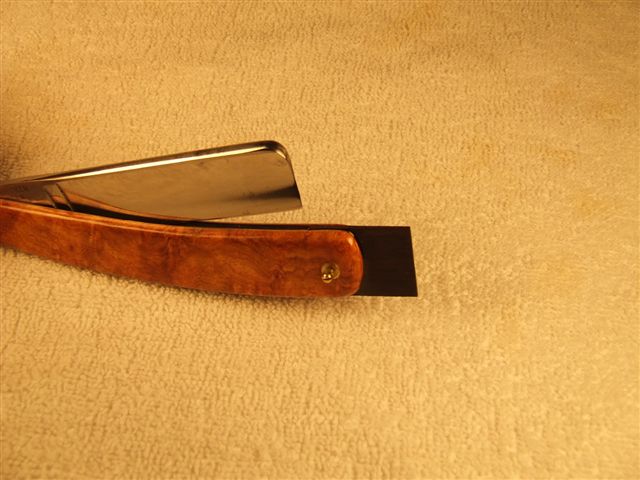
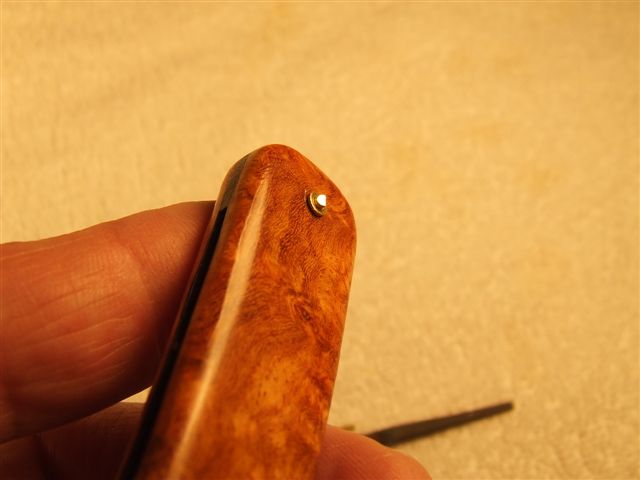
This is what the end looks like after the CA has been applied.

Put a washer on the pin you have rounded and push it through the wedge hole.

Put a washer on the other side and cut the pin. After the pin is cut, file it down close to the washer and peen the head on it. Finish both sides.
After the wedge end is finished, prep the end of a new pin and mount the blade with it. Make sure you put a large washer on each side of the blade between the blade and the liner. Before you finish the other side, check and make sure you have the blade mounted the correct direction. Put a washer on the other side, cut the pin, file and peen the ends over checking for tightness as you go.
When you are finished setting the pins, wax the scales with 3 or 4 coats and polish after each coat dries.

Finally the finished product.

Enjoy!
Ray
Straight Razor Sharp